Menu Management
Create, search, filter, edit, and manage all menu products in FoodEase Office.
In FoodEase Office: Open this page
The Items page is your main menu catalogue. Every product you sell — food, drinks, ingredients, combos — is managed here. Items are organised by class and group (Single, Recipe, Package, and more).
Staff need at least one of: Create Item, Edit Item, or Toggle Item permissions.
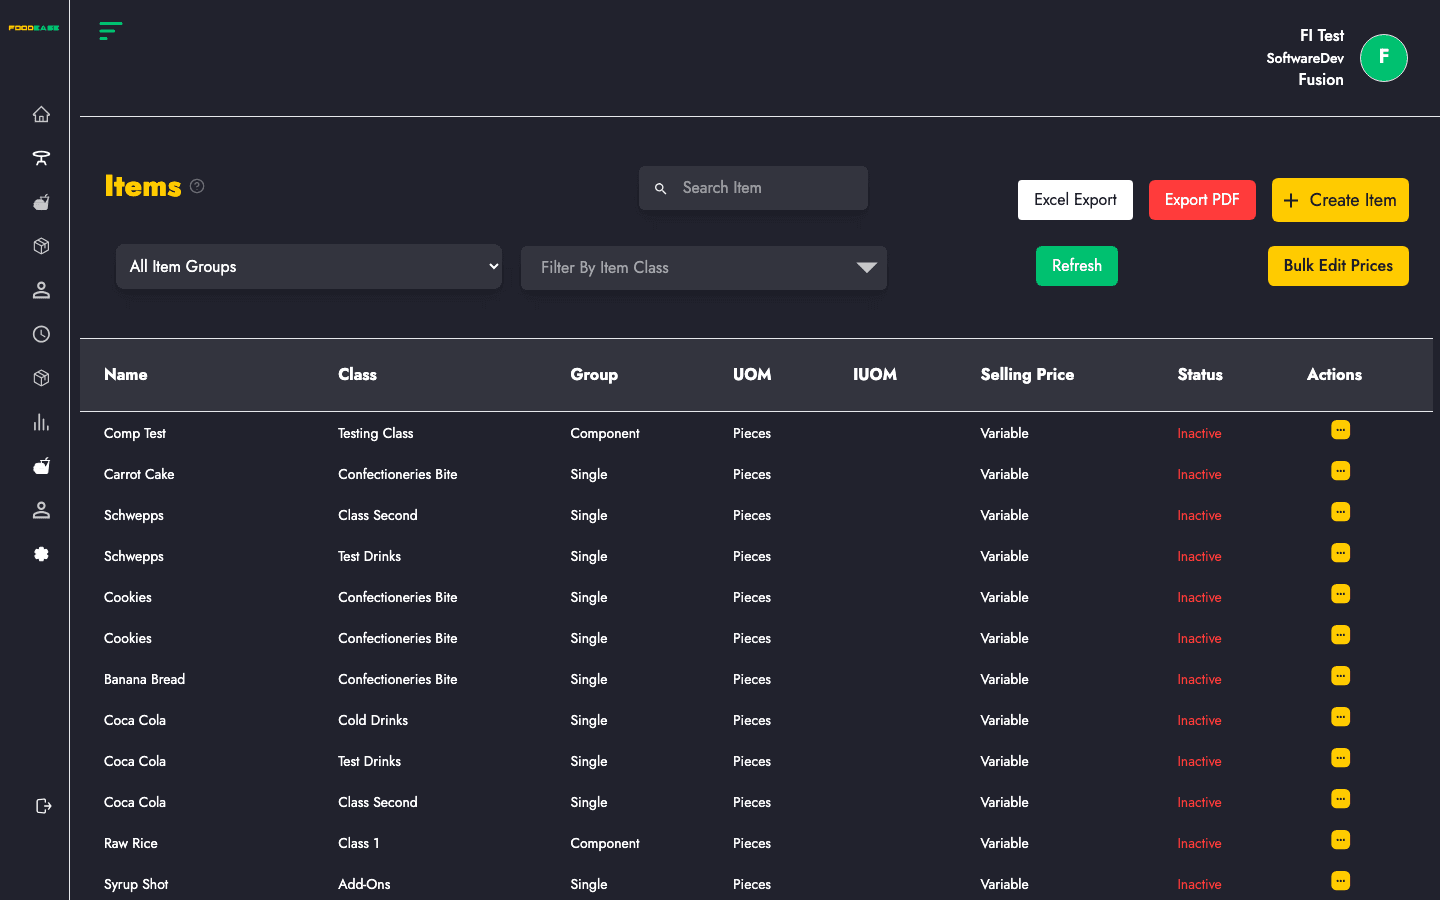
| Area | What it does |
|---|---|
| Search Item | Find items by name (press Enter to search) |
| All Item Groups filter | Filter by Single, Recipe, Package, Parent, Component, or Sundry |
| Item Class filter | Narrow results to one class |
| Create Item | Open the full item creation form |
| Export | Download your item list |
| Refresh | Reload the latest data from the server |
| Bulk Price | Update prices for multiple items at once |
| Table columns | Name, Class, Group, UOM, IUOM, Selling Price, Status, Actions |
| Group | Typical use |
|---|---|
| Single | A standalone menu product sold as-is |
| Recipe | A dish made from multiple ingredients with a recipe |
| Package | A bundle of items sold together |
| Parent | A base item with variants or child items |
| Component | An ingredient used inside recipes |
| Sundry | Miscellaneous items (napkins, service charges as items, etc.) |
Selling price may show as Variable for groups like Single, Recipe, Component, and Sundry when price is set at order time.
See the dedicated guide: Create an Item — full form walkthrough for every item group.
Quick steps:
| Field | Description |
|---|---|
| Name | Product name shown on POS and receipts |
| Item Class | Category the item belongs to |
| Unit of Measurement | How the item is counted or sold |
| Selling Price | Fixed price (where applicable) |
| Revenue Centres | Locations where the item is sold |
| Preparation Areas | Kitchen stations that receive tickets for this item |
| Tax | Sales tax applied to the item |
| Store Locations | Inventory locations (for stock-tracked groups) |
Before creating items: set up Item Class, Unit of Measurement, Revenue Centres, and Preparation Areas.
See Edit & Duplicate an Item for the full edit workflow.
The URL format is /dashboard/items/edit-items/{id}?itemGroup={group} — FoodEase opens the correct form automatically.
From the edit screen, click Duplicate to pre-fill a new item. See Edit & Duplicate an Item.
You need Toggle Item permission. Inactive items remain in the system but are hidden from active menus.
Use this when adjusting prices across a class or after a menu price change.
| Issue | What to try |
|---|---|
| No items shown | Clear filters, press Enter on an empty search, or click Refresh |
| Cannot create item | Ask your admin to grant Create Item permission |
| “Reload items” button appears | The list failed to load — click Reload items |
| Item not on POS | Check item is Active, class has Show on POS, and correct revenue centre is assigned |